Quickly Build a Hexo Blog with Vercel + GitHub
Basic Operations
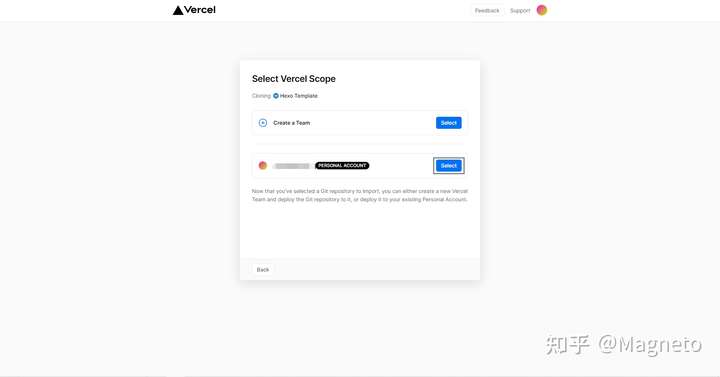
Select the content in the gray box, which is your GitHub, then click the Select button, then click GitHub. In GIT SCOPE, choose the user where you want to store Hexo. In REPOSITORY NAME, fill in the repository name where you want to store Hexo, and check the Create private Git Repository option. This option makes the repository private and invisible to others. Then click the Continue button. Without modifying anything, directly click Deploy and wait for it to automatically complete the build. It will finish within 3 minutes and assign a free secondary domain name that can be used temporarily (it won't be reclaimed, but it's not recommended for long-term use).
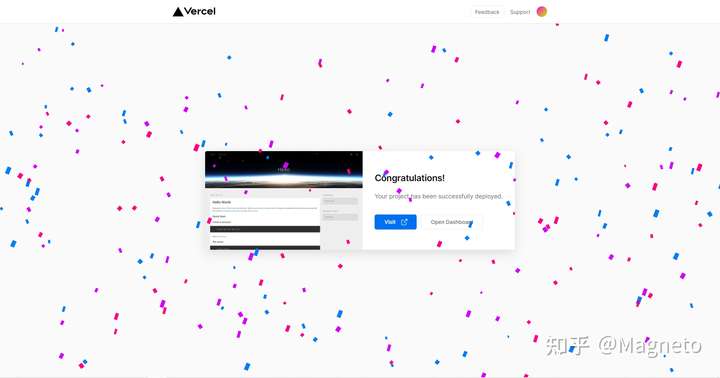
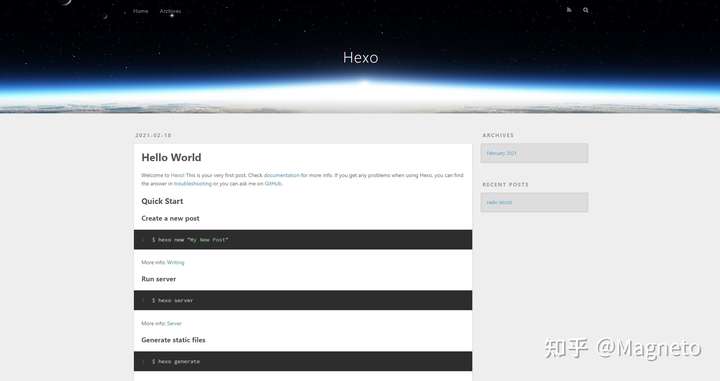
Once deployed, it will be bound to the repository you just filled in. Whenever there are changes in your repository, it will automatically sync and redeploy. The entire process can be completed in about 5 minutes.
Next up are advanced features: customizing themes and writing articles.
Advanced Features
Local Modifications
Environment Setup
- Windows PC
- Git for Windows
- Node.js ≥ v12
- NPM
- Hexo
Environment Installation
If you already have these, you can skip this step. If you don't need to check if it runs properly, you can also skip the installation.
This tutorial's environment is based on Windows 10 20H2.
Git (Required, even if you don't check if it runs properly, you must install it)
To use Git on Windows, you need Git for Windows. Download and install it (if you find the official website download speed too slow, you can go to Taobao NPM Mirror to download).
I am using Git-2.25.0-64-bit.exe downloaded from this link, installed with all default options.
Verify Installation
In the right-click menu of File Explorer or the Start menu, you can find Git Bash. Opening it will show a command-line interface. All local modifications to Hexo rely on this to check if the Hexo system runs properly.
Open Git Bash and check the version with the following commands:
node -v
npm -v
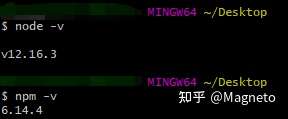
This means the environment is installed successfully.
Hexo
Hexo is a fast, simple, and powerful blog framework.
Open Git Bash and run the following command to install Hexo (it may take a while after pressing Enter; I waited 100s):
npm install -g hexo
A prompt like + hexo@{{version number}} indicates successful installation.
GitHub & SSH key (This section is adapted from FlyingSky)
Go to GitHub and register your account (please verify your email address promptly).
Open Git Bash and run the following command:
ssh-keygen -t rsa -C "{{your email address}}"
Press Enter 3 times in a row. This will generate a directory containing public and private keys in your user directory (usually C:/Users/{{your username}}/.ssh/).
Open this directory, find the id_rsa.pub file, open it with your favorite binary text editor (Notepad), and copy its contents. Go to GitHub -> Settings -> SSH and GPG keys -> New SSH key (i.e., this link]):
Paste the copied content into the Key field, fill in Title with whatever you like, and click Save (Add SSH Key).
Configure Git
Run the following commands:
git config --global user.name "{{your GitHub username}}"
git config --global user.email "{{your GitHub registered email address}}"
Verify Success
Open Git Bash and run the following command:
ssh -T git@github.com # No need to change the email address here
If prompted Are you sure you want to continue connecting (yes/no)? enter yes and press Enter.
Hi {{your GitHub username}}! You've successfully authenticated, but GitHub does not provide shell access.
Seeing this message means the configuration is successful.
At this point, the local environment is configured, and you can start making modifications.
Local Modifications
Use git commands to clone the repository stored on GitHub to your local machine.
git clone https://github.com/{{username}}/{{repository name}}.git
Note that cloning a private repository requires entering your GitHub account and password.
After cloning, you can choose to switch themes and write an article.
Switch Theme
If you like the default theme, skip this section.
I'll use SumiMakito/hexo-theme-Journal as a demonstration.
In your Hexo site directory, run the following command in Git Bash to install the theme (requires waiting):
git clone {{theme git file address}} themes/{{theme name}}
For example:
git clone https://github.com/SumiMakito/hexo-theme-Journal.git themes/journal
After downloading, modify _config.yml by changing theme: landscape to theme: {{theme name}}, then run hexo g to regenerate.
If some inexplicable problems occur, run hexo clean to clear the public directory, then regenerate and deploy.
Install Plugins
In your Hexo site directory, run the following command in Git Bash:
hexo new '{{article name}}'
After running, a {{article name}}.md file will appear in the source_posts` directory. Open this file with your favorite binary text editor (Notepad). hexo` generates the header information by default.
The file content structure is as follows:
---
title: {{article name}}
date: {{article date}}
categories: {{article categories}}
tags: {{article tags [tag1,tag2,tag3]}}
description: {{article summary}}
---
{{article body}}
The article content supports Markdown syntax.
Run Test
After writing articles and installing themes, you can run the following command:
hexo g -s
After entering the command, visit localhost:4000 to check if it runs properly.
Deploy Hexo Blog
If the previous step runs properly, you can push it to GitHub via Git Push, and Vercel will automatically pull and deploy. If you don't know how to Push, you can search on Baidu. CSDN and Blog Park have similar tutorials. This article will include a Push tutorial at the end, but it won't be detailed. It's recommended to learn on your own via Baidu.
CloudStudio Modifications
Environment and Preparation
- CloudStudio account https://cloudstudio.net/
- Hexo
Environment Installation
I won't teach you how to register for CloudStudio here.
After entering Coding, find CloudStudio on the left. After authorization, click New Workspace, then select Node.js. Name it whatever you like, and choose empty for the code source.
After creating the workspace, enter it, click on Terminal, and create a new terminal. Most of the following operations will be done in the terminal.
Verify Installation
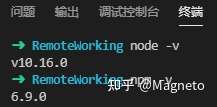
Enter the following in the terminal:
node -v
npm -v
If versions are displayed, you can start modifying on CloudStudio.
</center>
Hexo
Hexo is a fast, simple, and powerful blog framework.
Open the terminal and run the following command to install Hexo:
npm install -g hexo
A prompt like + hexo@{{version number}} indicates successful installation.
GitHub & SSH key
First, you can see the path is RemoteWorking. We need to set the file storage path to root.
Execute:
cd /root
We choose to open a folder and then enter the root folder.
In the terminal, enter:
ssh-keygen -t rsa -C "{{your email address}}"
Press Enter 3 times in a row. This will generate a directory containing public and private keys in your user directory (usually C:/Users/{{your username}}/.ssh/).
Open this directory, find the id_rsa.pub file, open it with your favorite binary text editor (Notepad), and copy its contents. Go to GitHub -> Settings -> SSH and GPG keys -> New SSH key (i.e., this link]):
Paste the copied content into the Key field, fill in Title with whatever you like, and click Save (Add SSH Key).
Configure Git
Run the following commands:
git config --global user.name "{{your GitHub username}}"
git config --global user.email "{{your GitHub registered email address}}"
Verify Success
Open Git Bash and run the following command:
ssh -T git@github.com # No need to change the email address here
If prompted Are you sure you want to continue connecting (yes/no)? enter yes and press Enter.
Hi {{your GitHub username}}! You've successfully authenticated, but GitHub does not provide shell access.
Seeing this message means the configuration is successful.
At this point, the local environment is configured, and you can start making modifications.
CloudStudio Modifications
Then, use git commands to clone the repository stored on GitHub to CloudStudio.
git clone git@github.com:username/repository name.git
Note that cloning a private repository requires authorization. You can go to https://github.com/settings/tokens/new to generate a token with full permissions and submit it to CloudStudio for authorization.
After cloning, you can choose to switch themes and write an article.
Switch Theme
If you like the default theme, skip this section.
I'll use SumiMakito/hexo-theme-Journal as a demonstration.
cd /{{Hexo directory}}
Run the following command to install the theme (requires waiting):
git clone {{theme git file address}} themes/{{theme name}}
For example:
git clone https://github.com/SumiMakito/hexo-theme-Journal.git themes/journal
After downloading, modify _config.yml by changing theme: landscape to theme: {{theme name}}, then run hexo g to regenerate.
If some inexplicable problems occur, run hexo clean to clear the public directory, then regenerate and deploy.
Install Plugins Enter the Hexo directory:
cd /{{Hexo directory}}
Enter the following command in the terminal:
npm install hexo-deployer-git --save
Write Articles Enter the Hexo directory:
cd /{{Hexo directory}}
Enter the following command in the terminal:
hexo new '{{article name}}'
After running, a {{article name}}.md file will appear in the source_posts` directory. Click the file. hexo` generates the header information by default.
The file content structure is as follows:
---
title: {{article name}}
date: {{article date}}
categories: {{article categories}}
tags: {{article tags [tag1,tag2,tag3]}}
description: {{article summary}}
---
{{article body}}
The article content supports Markdown syntax.
Deploy Hexo Blog
Since it's not possible to run a local test, we'll directly Push. Under normal circumstances, if there are no issues with the theme or plugins, directly pushing and deploying should be fine. If you don't know how to Push, you can search on Baidu. CSDN and Blog Park have similar tutorials. This article will include a Push tutorial at the end, but it won't be detailed. It's recommended to learn on your own via Baidu.
GitHub Push
Here I only provide a code snippet. For specific situations, you need to learn from Baidu. Git commands are as deep and unfathomable as Linux commands...
git status
git add .
git status
git commit -m 'comment'
git branch -m master
git push -f origin master
Generally, for the first push, you need to execute git add . before running this command.
Of course, you can also use IDE software for control, which is very convenient.
Conclusion
Alright, this super long Hexo deployment tutorial is finished. I will continue to modify it based on the situation.
All references:
- Let's Build a Hexo Site with GitHub Pages Borrowed methods
- Super Detailed Hexo+Github Page Blog Building Tutorial [Continuous Update] Writing new articles
- The Most Detailed "Screenshot" Guide to Building a Hexo Blog and Deploying to Github A snippet of
hexo g -scode - How to Submit Cloud Studio Code to Other Git Platforms Confused my brain
Things that helped me write this article:
- A glass of water
- A glass of milk
- GitHub Proxy for acceleration
- 50 songs averaging 4 minutes each
If there are any errors in the above content, you may need to do further in-depth learning via Baidu or refer to the materials I referenced.